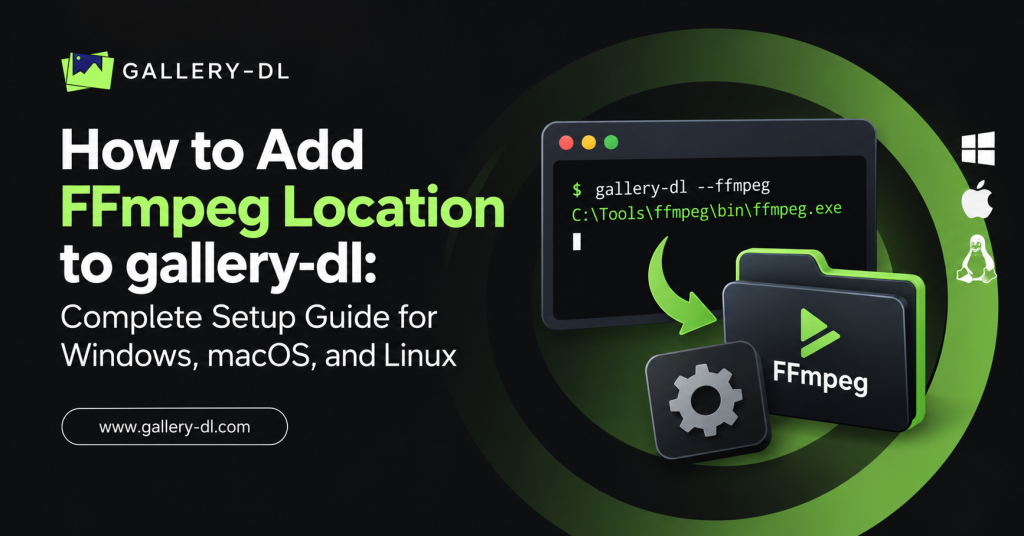
If gallery-dl cannot find FFmpeg, you may see conversion errors when processing media that requires FFmpeg. The usual fix is to install FFmpeg and either add it to your system PATH or enter the full FFmpeg executable location in your gallery-dl configuration.
This guide explains how to add FFmpeg location to gallery-dl with clear Windows, macOS, and Linux examples. It also covers where to place the setting, how to verify the path, and how to fix common FFmpeg errors.
Table of Contents
ToggleQuick Answer: Add FFmpeg Location to gallery-dl
Add the full path to the FFmpeg executable in your gallery-dl configuration file:
{
  "ugoira": {
    "ffmpeg-location": "C:\\ffmpeg\\bin\\ffmpeg.exe"
  }
}
On macOS or Linux, the setting can look like this:
{
  "ugoira": {
    "ffmpeg-location": "/usr/bin/ffmpeg"
  }
}
gallery-dl’s ugoira.ffmpeg-location option specifies the location of the FFmpeg or avconv executable. Its default value is simply ffmpeg, which works only when FFmpeg is available in your system PATH.
What Is FFmpeg and Why Does gallery-dl Need It?
FFmpeg is a multimedia command-line tool used to process audio and video. gallery-dl may need it for supported conversion workflows, such as converting Pixiv Ugoira animation frames into formats including WebM, MP4, or GIF.
gallery-dl supports a Ugoira post-processor that converts Pixiv Ugoira files with FFmpeg.
You do not need FFmpeg for every normal image download. It is mainly needed when gallery-dl must combine, remux, or convert media.
First: Check Whether FFmpeg Is Already Installed
Before changing your gallery-dl configuration, open Command Prompt, PowerShell, or Terminal and run:
ffmpeg -version
If the command displays FFmpeg version details, it is already installed and available in your PATH.
If you get an error such as:
ffmpeg is not recognized
or:
command not found: ffmpeg
you need to install FFmpeg or point gallery-dl to its full location.
How to Install FFmpeg on Windows
Download FFmpeg
Download a trusted FFmpeg build for Windows, extract the archive, and place it in a stable folder. A common choice is:
C:\ffmpeg\
Inside that folder, the executable is usually located at:
C:\ffmpeg\bin\ffmpeg.exe
Do not move or delete the folder after adding it to your gallery-dl configuration.
Verify the FFmpeg Executable
Open PowerShell and run:
C:\ffmpeg\bin\ffmpeg.exe -version
If it displays version information, the executable path is correct.
How to Install FFmpeg on macOS
The easiest macOS installation method is Homebrew:
brew install ffmpeg
After installation, verify it:
ffmpeg -version
Common FFmpeg locations on macOS include:
/usr/local/bin/ffmpeg
or, on many Apple Silicon systems:
/opt/homebrew/bin/ffmpeg
To find the exact path on your computer, run:
which ffmpeg
How to Install FFmpeg on Linux
On Linux, install FFmpeg through your distribution’s package manager.
For Debian or Ubuntu:
sudo apt update
sudo apt install ffmpeg
For Fedora:
sudo dnf install ffmpeg
For Arch Linux:
sudo pacman -S ffmpeg
Then verify the installation:
ffmpeg -version
To find the exact executable path, run:
which ffmpeg
A common Linux path is:
/usr/bin/ffmpeg
Where to Add the FFmpeg Location in gallery-dl
gallery-dl uses a JSON-based configuration file. The required setting is:
ugoira.ffmpeg-location
The correct JSON structure is:
{
  "ugoira": {
    "ffmpeg-location": "PATH_TO_FFMPEG"
  }
}
Replace PATH_TO_FFMPEG with the full path to your FFmpeg executable.
The official gallery-dl documentation describes this option as the location of the FFmpeg or avconv executable used by the Ugoira processor.
Add FFmpeg Location to gallery-dl on Windows
On Windows, use double backslashes inside JSON paths.
Correct example:
{
  "ugoira": {
    "ffmpeg-location": "C:\\ffmpeg\\bin\\ffmpeg.exe"
  }
}
Do not use single backslashes in JSON:
{
  "ugoira": {
    "ffmpeg-location": "C:\ffmpeg\bin\ffmpeg.exe"
  }
}
That format may cause a JSON parsing error because backslashes are treated as escape characters.
Windows Path with Spaces
If your FFmpeg folder contains spaces, keep the path inside quotation marks:
{
  "ugoira": {
    "ffmpeg-location": "C:\\Program Files\\FFmpeg\\bin\\ffmpeg.exe"
  }
}
Add FFmpeg Location to gallery-dl on macOS
If FFmpeg is installed through Homebrew on Apple Silicon, use:
{
  "ugoira": {
    "ffmpeg-location": "/opt/homebrew/bin/ffmpeg"
  }
}
For many Intel-based macOS systems:
{
  "ugoira": {
    "ffmpeg-location": "/usr/local/bin/ffmpeg"
  }
}
If you are unsure, use:
which ffmpeg
Then copy the returned path into the configuration file.
Add FFmpeg Location to gallery-dl on Linux
A typical Linux configuration looks like this:
{
  "ugoira": {
    "ffmpeg-location": "/usr/bin/ffmpeg"
  }
}
Again, run this command to confirm the correct path:
which ffmpeg
How to Open or Create the gallery-dl Config File
gallery-dl includes options to create and open its configuration file.
Create a basic configuration file:
gallery-dl --config-create
Open the configuration file:
gallery-dl --config-open
gallery-dl also provides --config-status to check the current configuration-file status.
After opening the configuration file, add your FFmpeg location without deleting your existing settings.
Example: gallery-dl Config with Download Folder and FFmpeg Path
You can combine multiple settings in one JSON configuration file:
{
  "extractor": {
    "base-directory": "~/Downloads/gallery-dl"
  },
  "ugoira": {
    "ffmpeg-location": "/usr/bin/ffmpeg"
  }
}
Windows version:
{
  "extractor": {
    "base-directory": "C:\\Users\\YourName\\Downloads\\gallery-dl"
  },
  "ugoira": {
    "ffmpeg-location": "C:\\ffmpeg\\bin\\ffmpeg.exe"
  }
}
Make sure every section is separated with a comma and that all opening braces have matching closing braces.
Use FFmpeg Through Your System PATH Instead
If FFmpeg is properly added to your system PATH, you may not need to add a location in gallery-dl at all.
The default gallery-dl setting is:
ffmpeg
This means gallery-dl searches for an executable named ffmpeg through your operating system’s PATH.
Add FFmpeg to PATH on Windows
- Find the FFmpeg
binfolder, such as:
C:\ffmpeg\bin
- Search Windows for Environment Variables.
- Open Edit the system environment variables.
- Select Environment Variables.
- Select the
Pathvariable under your user variables. - Click Edit.
- Click New.
- Add the FFmpeg
binfolder. - Save the changes.
- Close and reopen PowerShell or Command Prompt.
Then test:
ffmpeg -version
If it works, gallery-dl should be able to find FFmpeg automatically.
How to Test FFmpeg with gallery-dl
First, verify FFmpeg directly:
ffmpeg -version
Then verify gallery-dl:
gallery-dl --version
If you are using a conversion workflow that needs FFmpeg, test it with media you own or are authorized to download. Check the terminal output for errors related to FFmpeg paths, missing executables, or conversion settings.
For Pixiv Ugoira conversion, gallery-dl supports the --ugoira option with formats such as WebM, MP4, GIF, VP8, VP9, and ZIP.
Example:
gallery-dl --ugoira mp4 "YOUR_AUTHORIZED_URL"
Common FFmpeg Location Errors in gallery-dl
“ffmpeg not found”
gallery-dl cannot locate the FFmpeg executable.
Fix it by either:
- Adding FFmpeg to your system PATH.
- Adding the full path through
ugoira.ffmpeg-location. - Checking that the FFmpeg file still exists in the specified folder.
“No such file or directory”
The executable path is incorrect.
Run the FFmpeg file directly to test it:
/path/to/ffmpeg -version
On Windows:
C:\ffmpeg\bin\ffmpeg.exe -version
If that command fails, correct the path before editing gallery-dl.
JSON parsing error
Your configuration syntax is likely incorrect.
Common causes include:
- Missing commas.
- Missing quotation marks.
- Single backslashes in Windows paths.
- An extra comma after the last setting.
Use this valid Windows example:
{
  "ugoira": {
    "ffmpeg-location": "C:\\ffmpeg\\bin\\ffmpeg.exe"
  }
}
FFmpeg works in Terminal but not in gallery-dl
Add the full executable path directly to gallery-dl’s configuration. This avoids problems caused by an outdated PATH environment, multiple FFmpeg installations, or a terminal that was opened before PATH changes were saved.
FFmpeg conversion fails
Confirm that:
- You installed a complete FFmpeg build.
- The file path is correct.
- The output format is supported.
- gallery-dl is updated.
- You have enough disk space.
- You are using media you are allowed to process.
Best Practices for gallery-dl and FFmpeg
Use these practices for a cleaner setup:
- Install FFmpeg from a trusted source or package manager.
- Keep both FFmpeg and gallery-dl updated.
- Use the full path in gallery-dl when PATH detection is unreliable.
- Keep your gallery-dl JSON configuration valid and backed up.
- Test the FFmpeg path before running a larger task.
- Store your authorized downloads in a dedicated folder.
- Do not use conversion tools to bypass platform restrictions or creator permissions.
FAQ: How to Add FFmpeg Location to gallery-dl
What is the FFmpeg location setting in gallery-dl?
The setting is:ugoira.ffmpeg-location
It tells gallery-dl where the FFmpeg executable is located.
What is the default FFmpeg location in gallery-dl?
The default is:ffmpeg
This works when FFmpeg is already available in your system PATH.
How do I add FFmpeg location on Windows?
Use a JSON path with double backslashes:{
"ugoira": {
"ffmpeg-location": "C:\\ffmpeg\\bin\\ffmpeg.exe"
How do I find FFmpeg location on macOS or Linux?
Then copy the returned path into ugoira.ffmpeg-location.
Do I need FFmpeg for all gallery-dl downloads?
No. FFmpeg is mainly needed for media conversion or processing workflows, including supported Ugoira conversio
Conclusion
To add an FFmpeg location to gallery-dl, install FFmpeg, find its executable path, and place that path under ugoira.ffmpeg-location in your gallery-dl configuration file. On Windows, remember to use double backslashes; on macOS and Linux, use the full Unix-style path.
For a smooth Gallery-DL setup, keep FFmpeg available through your system PATH when possible, use the direct configuration path when needed, and test the setup before processing larger authorized media collections.
latest post
- Domain Lookup: How to Check Domain Availability, Ownership, and Details
- How to Pause gallery-dl: Stop, Resume, and Manage Interrupted Downloads
- How to Use gallery-dl GitHub: Install, Update, and Run gallery-dl from the Official Project
- How to Use gallery-dl for Bunkr: Download Public and Authorized Files Safely
- How to Use gallery-dl for Flickr: Download Photos, Albums, and Your Authorized Media